Astrophotography can seem like an overwhelming addition to amateur astronomy. Over the past several weeks I have attempted to photograph the night sky and will show you what has worked best for me using some entry level equipment and a little bit of research.
Step 1: Buying a Camera and Lens


While I didn’t buy the Canon Rebel SL2 specifically for astrophotography, virtually all new DSLR cameras will provide wonderful results for entry to intermediate level users. The 24 Megapixel CMOS (APS-C) sensor provides more than the necessary minimum for nighttime imaging. It’s standard kit zoom lens featuring an 18-55mm focal length is a nice starter lens and offers fairly sharp fields of view.
Step 2: Adjusting Camera Settings

Be sure to turn your camera dial to Manual Mode. This will give you complete control throughout the entire process. I’ve also configured a menu tab aptly named “Astronomy” which allows me to easily change some of the most important settings involving shooting the nighttime sky.
- Image Quality-Raw and Large jpeg
- Picture Style-Neutral
- White Balance-Daylight (5200K)
- Long Exposure Noise Reduction- On
- High ISO Speed Noise Reduction-Standard
- Drive Mode-2 Seconds
Step 3: Mounting the Camera to the Tripod
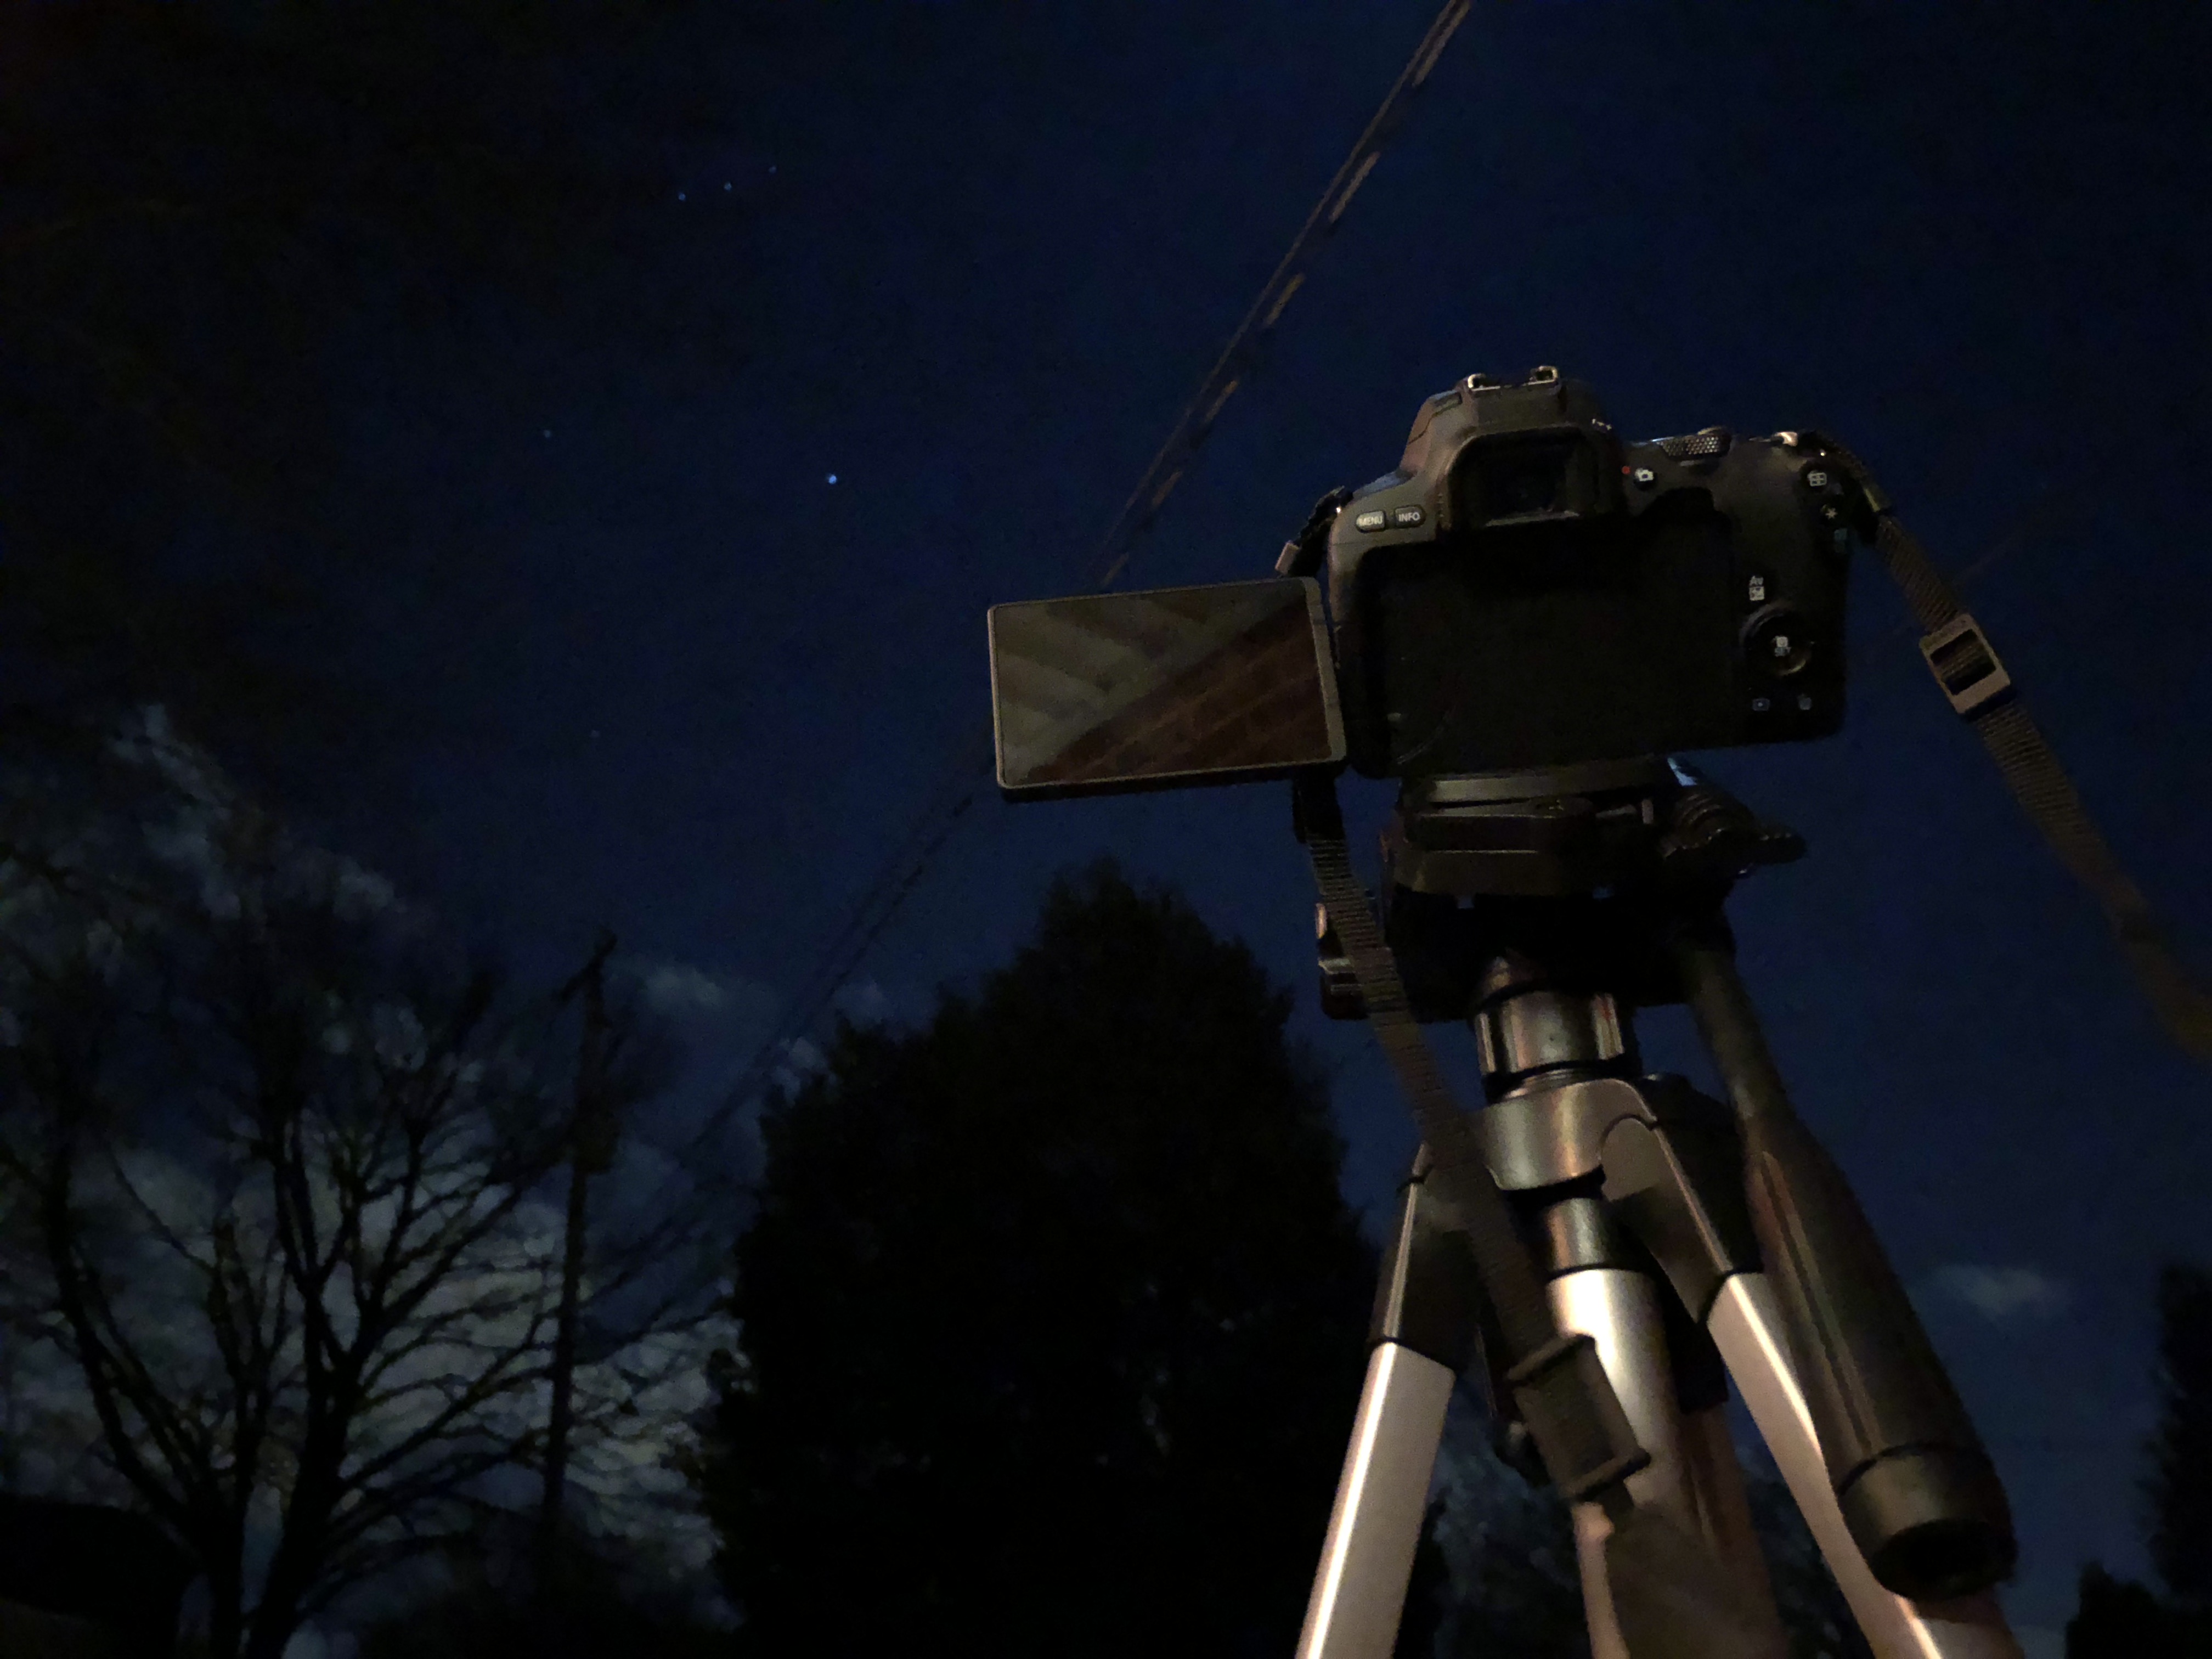
The cheapest and easiest way to get into astrophotography involves using a tripod and your DSLR. After connecting the SL2 to the tripod, I chose Orion’s Nebula as my target. Before moving on, I had to determine the proper focal length, focus, aperture, shutter speed and ISO.
Step 4: Setting up and taking the Shot
- Focal Length and Focus:
How zoomed in do you want your image? This is what the focal length controls. I wanted a zoomed in image of Orion’s Nebula, so I chose to set my lens at it’s maximum 55mm focal length. To focus, make sure that your lens is switched to manual focus and use the digital magnifying feature to show a 10x image of the constellation in the live viewing screen. Slowly turn the focus ring until you get the sharpest stars possible. - Aperture:
How much light is going through your lens and into your sensor? This is what the aperture controls. The best possible aperture for my zoom lens set at 55mm is f/5.6. This is not a strong point of my kit lens. I hope to upgrade this to a fixed 50mm f/1.8 in the near future. - Shutter Speed:
How long do you want your camera’s shutter open to allow light onto your sensor? This is what the shutter speed controls. I was looking for as long a time as possible to bring out detail in Orion’s Nebula, without creating star trails. There are a lot of ways to determine how long the shutter can stay open without creating star trails. The website LonelySpeck has an excellent calculator for determining this setting. For my camera’s sensor and zoom lens set at 55mm, 4 seconds was the longest length of time I could afford. - ISO:
How sensitive do you want your camera to be when the shutter is open and light is hitting the sensor? This is what the ISO controls. Increasing it will brighten your image, but also increase digital noise. Finding a balance between sensitivity and image quality will vary depending on your camera’s sensor. For my Canon SL2 shooting Orion’s Nebula a setting of ISO 3200 gave me the best results.
Step 5: Post Processing
- How much detail can you bring out of your image? This is what imaging software controls. Canon’s Digital Photo Professional 4 is free software provided by Canon if you buy their products. It is excellent for editing RAW images, which contain much more image information than jpeg files. There are a variety of paid and free choices from Adobe Photoshop to Raw Therapee. The learning curve on these can be pretty steep, but I have found DPP4 to be fairly user friendly and powerful. The most useful settings for me so far have been contrast, shadow, highlight, color tone and color saturation.

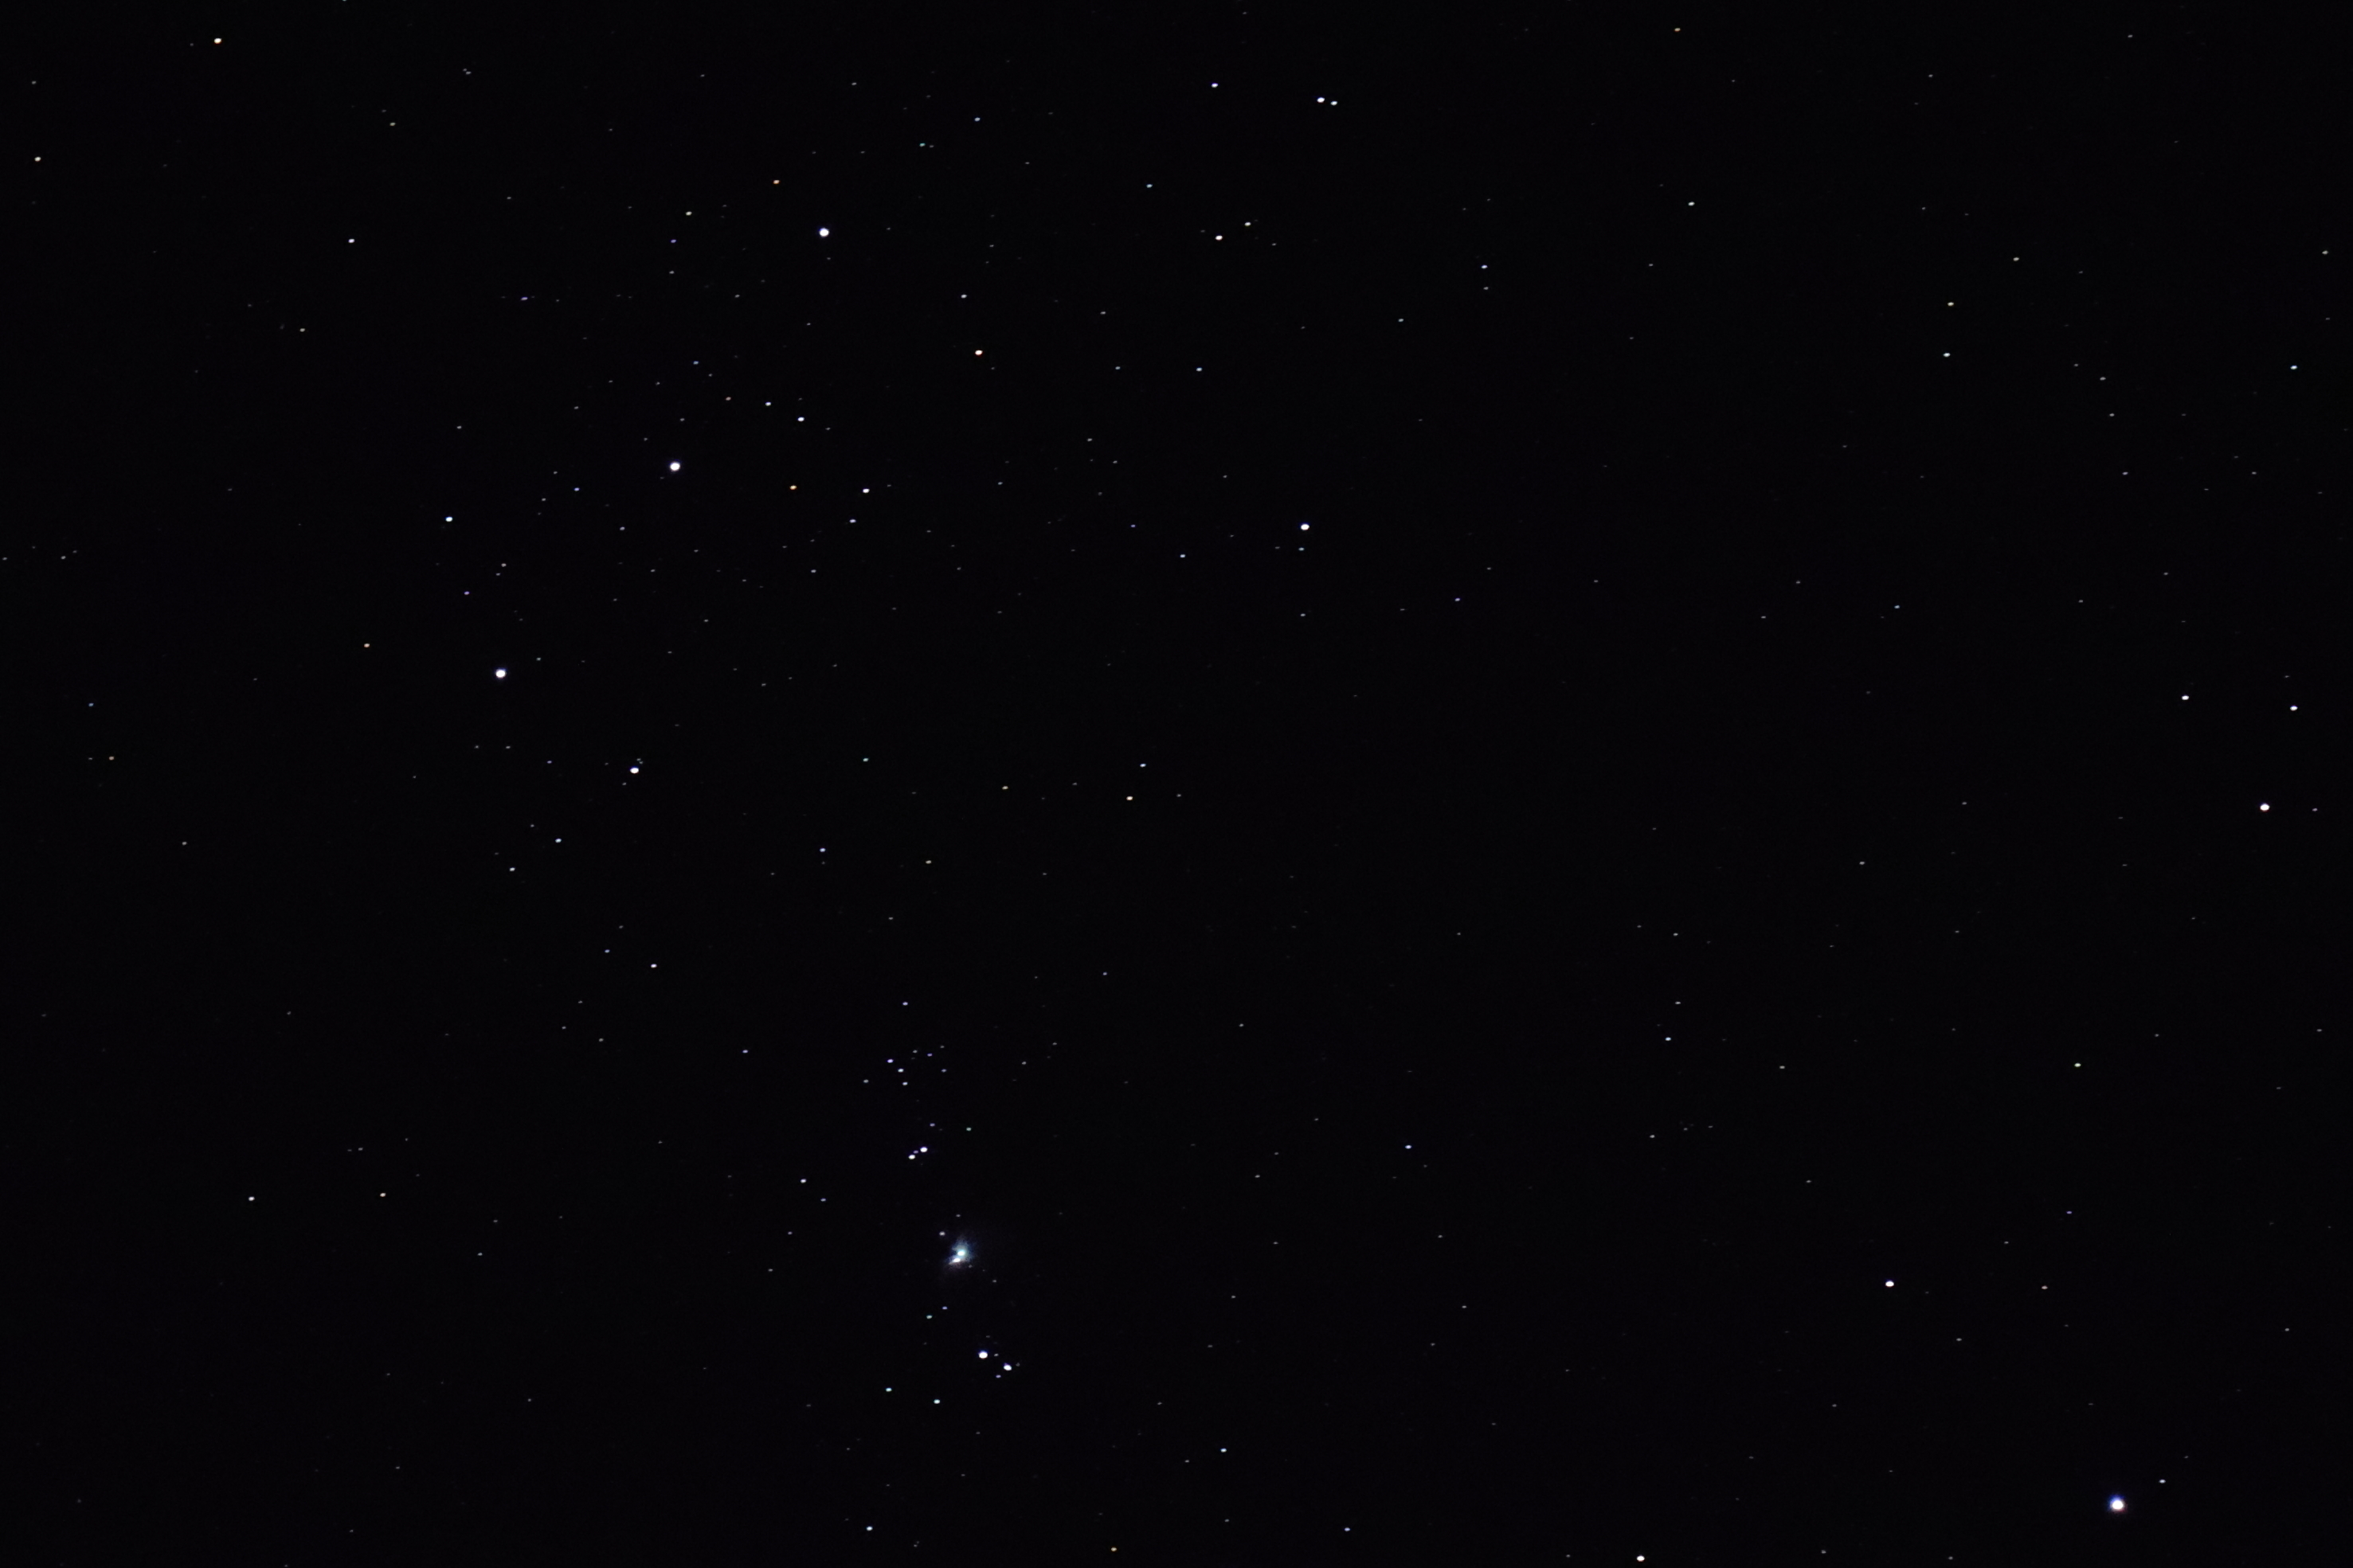
The Final Result:
Orion Nebula: 12/27/17
Canon SL2, 55mm, f/5.6, 4 Seconds, ISO 3200
Enhanced and Cropped with Digital Photo Professional 4


There have been several sources that have provided me with a lot of the information presented in this article. “The Backyard Astronomer’s Guide” has been my constant companion as I have expanded my interest in amateur astronomy. That book, along with the websites ImprovePhotography, Astropix and LonelySpeck have given me tremendous assistance in my early efforts at understanding astrophotography. Hopefully, this article helped you as well. Please leave a comment with any questions or suggestions you may have.

Getting suitable morning meal everyday could help faculty college students to get wholesome and
lively plus sustain how a lot they weigh https://math-problem-solver.com/ .
A frugal shopper has expertise that assist her or him purchase benefit of the money-saving opportunities in life.