Upon receiving my telescope in 2009, I decided to start keeping a list of astronomical observations. From that, LateNightAstronomy was born. Through this website, I have listed over 125 objects (including the Earth) on pages such as “What I’ve Viewed” and “Nightly News”. While, I will be continuing to list objects and nightly events in this format, I am now beginning to take hand written official observational logs to catalog objects for certification through the Astronomical League.

The First Three Logbooks
To begin the process, I decided to focus on three observing programs the Astronomical League has to offer:
“Messier Observing Program”
This is a wonderful starting point for documenting some of the most impressive 110 objects of the deep sky. I suspect it will take me two to three years to view all of the objects given limitations of seeing from my house and the slow shift of the stars throughout the year.
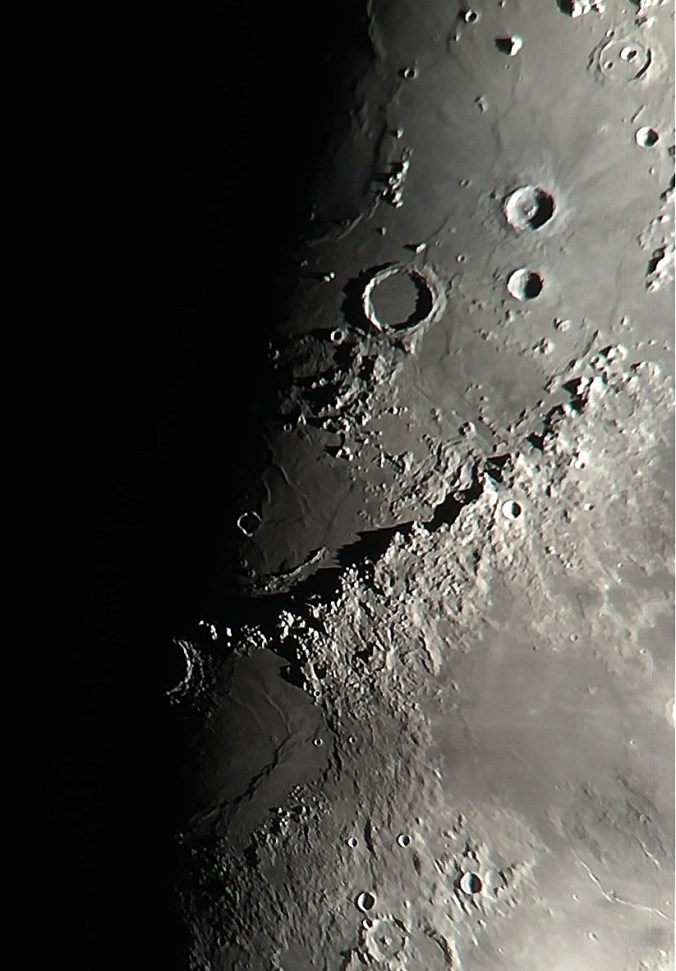
“Lunar Observing Program”
For nights when the Moon will be blocking out my Messier observing, I’ve decided to start charting the lunar surface. The 100 objects listed in this program are great for people new to astronomy and can be completed with a pair of binoculars or a small telescope. I hope to have this program completed within three to four months.
“Comet Observing Program”
With Comet C/2015 V2 Johnson currently in the night sky, I thought it might be a good idea to start an official logbook for comets. Documenting 12 comets for this program will take quite a while, and I expect it to be completed in 4 to 5 years.
“The Logbooks”
To assist me in my official observations, I came across a wonderful logbook created by Matt Wedel over at 10minuteastronomy. I took his design concept for the Messier book and formatted my own books for the lunar and comet observing programs using resources provided by the Astronomical League. After a quick run to Staples, I had some premium printed, coil bound and plastic covered logbooks to begin my journey into the Astronomical Leagues Observing Program.
-

- The Messier Logbook
-
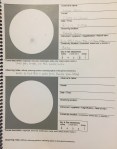
- The Comet Logbook
-

- The Lunar Logbook


 These collections of stars always impress me with their elegance and simplicity. Not nearly as dense and “fuzzy” as globular clusters, open clusters can be difficult to find but rewarding to discover. Take M18 for example, to verify that I had the correct collection of stars, I had to consult my star chart (Sky Safari 4 Plus on my iPhone) that I was in the correct region of the sky. I did this by counting stars and comparing patterns between what was in my eyepiece and what the chart on my app showed. M23, M26 and NGC 6633 rounded out the list of open clusters viewed.