The Andromeda Galaxy is one of the most impressive spiral galaxies in the night sky. Even at a distance of 2.5 million light years its massive central core takes up about as much sky as a full Moon. This image captured over 1 hour worth of light from Andromeda’s 1 trillion stars and took about 3 hours to process and edit!
“The heavens declare the glory of God” Psalm 19:1
Io casting an impressive shadow as it moves between Jupiter and the Sun. Tracking these transits across the surface of Jupiter is a really interesting observing opportunity and shows the ever evolving dance between Jupiter and it’s many moons.
Tonight, I completed my imaging goal for the summer. Mars, Jupiter and Saturn have all been filmed, stacked and processed using a DSLR camera. All three of these images were captured at f/11.8 which means the images above are at accurate scale to each other as viewed through the Orion Xt8i. Mars was the last holdout, with the dust storm washing out most detail during my earlier attempts in late July. For comparison, below are my previous images of these three planets taken with an iPhone 6 back in 2016.
June 7/8, 2018: Those Summer Nights
Summer is not a favorable season for amateur astronomy. The nights are short, dew sneaks up on you and the insects are annoying. On this night, the skies were clear, the dew point was reasonable and the insects were not biting, at least not that bad. With the moon not rising until 2:45 AM, it was a wonderful opportunity to work through some deep-sky objects on my Messier List.
10:45 PM to Midnight
After allowing the telescope to cool for an hour, the evening began with M13-Hercules, a favorite of mine since my first observations of it in 2010. It is one of the most impressive views in the night sky and a treat to show off to family and friends. What starts off as a dense blurry core is peeled away to reveal finer levels of detail at medium and high magnifications, where thousands of stars become visible. Objects such as this truly reveal to me the glory of God’s creation. My success rate at finding and being impressed by other globulars tonight was hit and miss. While the small but impressive M92 was easy to find, the dimmer M107 was nowhere to be seen due to light pollution near the horizon. Most of the other globular clusters early this evening were of little detail, including M19, M80 and M9.
Midnight to 12:15 AM Lauren came out to take a look at Hercules and Saturn. While she was impressed by the fine detail of Hercules, her favorite sight is always Saturn. She has a better eye for fine detail on the planets than myself and easily picked up the Cassini division and a dim cloud band across the middle of the planet.
1:00 AM to 1:30 AM
The hunt for globular and open clusters continued after a brief hiatus. M22 was a surprisingly impressive globular cluster with fine detail in its core showing up at 96x and 200x magnification. Hopping over just a couple degrees was the smaller and less defined M28. Switching to an open cluster, M25 was just a stone’s throw away from Saturn with a pretty collection of stars shown at lower magnifications. While M54 was difficult to find due to light pollution near the horizon, M70 was impossible. What awaited next was the most pleasant surprise of the evening, M11–The Wild Duck Cluster was a beautifully dense and sharply detailed open cluster. It could easily be mistaken for a globular cluster because of the density of the core. At 96x and 200x magnification, it revealed some fine details including one star shining brightly in the upper center of the core.
1:30 AM to 2:00 AM
Shifting gears to some things a bit closer home, Jupiter, Saturn and Mars were on display throughout most of this evening. Atmospheric conditions were ideal with fairly cool temperatures and no wind. Of the three, Jupiter in particular was stunning in it’s sharpness and clarity with three of its moons Io, Ganymede and Callisto in a tight triangular formation. I Hooked my iPhone up to the telescope and took some videos of the planets.
Here is some of the video I shot that is posted on my YouTube Channel.
The 1080p 60 FPS footage was sent to Registax 6 to enhance the sharpness. Then the color and contrast were enhanced in Adobe Premiere Elements 6 to create the following image of Saturn at 1200x magnification.
3:15 AM to 4:00 AM
With that, the night was done–or so I thought! Having brought in all of my equipment, I realized I was just three Messier objects shy of hitting the halfway point. I looked at the clock and decided to lug everything back out for three more objects. The final three Messier objects began with M73, an open cluster with a simplistic four star pattern. It took a while to verify its location, with observations at higher magnifications revealing more of the stars in its formation. One wonders why an object like this was included in the Messier list to begin with. Second to last was M15, a small yet surprisingly bright globular cluster with an impressive core which revealed some structural details at higher magnifications. The night officially ended with the anticlimactic M2, revealing itself only as a small blurry globular cluster with some minor fine detail at 200x magnification.
4:00 AM to 4:15 AM Before going in, a few more attempts were made to capture Mars on video, since it had moved up from the horizon into better atmospheric conditions. As I was packing up, my Apple Watch showed that the Moon had recently risen. Walking around my property, I found a spot that showed it just peaking above the horizon. Seeing the Moon at this early morning hour was a perspective that I have seen few times before. Seeing the Moon at this hour with the waning crescent portion of it visible gave me a new perspective on a familiar sight.
Astrophotography can seem like an overwhelming addition to amateur astronomy. Over the past several weeks I have attempted to photograph the night sky and will show you what has worked best for me using some entry level equipment and a little bit of research.
Step 1: Buying a Camera and Lens
While I didn’t buy the Canon Rebel SL2 specifically for astrophotography, virtually all new DSLR cameras will provide wonderful results for entry to intermediate level users. The 24 Megapixel CMOS (APS-C) sensor provides more than the necessary minimum for nighttime imaging. It’s standard kit zoom lens featuring an 18-55mm focal length is a nice starter lens and offers fairly sharp fields of view.
Step 2: Adjusting Camera Settings
Be sure to turn your camera dial to Manual Mode. This will give you complete control throughout the entire process. I’ve also configured a menu tab aptly named “Astronomy” which allows me to easily change some of the most important settings involving shooting the nighttime sky.
Image Quality-Raw and Large jpeg
Picture Style-Neutral
White Balance-Daylight (5200K)
Long Exposure Noise Reduction- On
High ISO Speed Noise Reduction-Standard
Drive Mode-2 Seconds
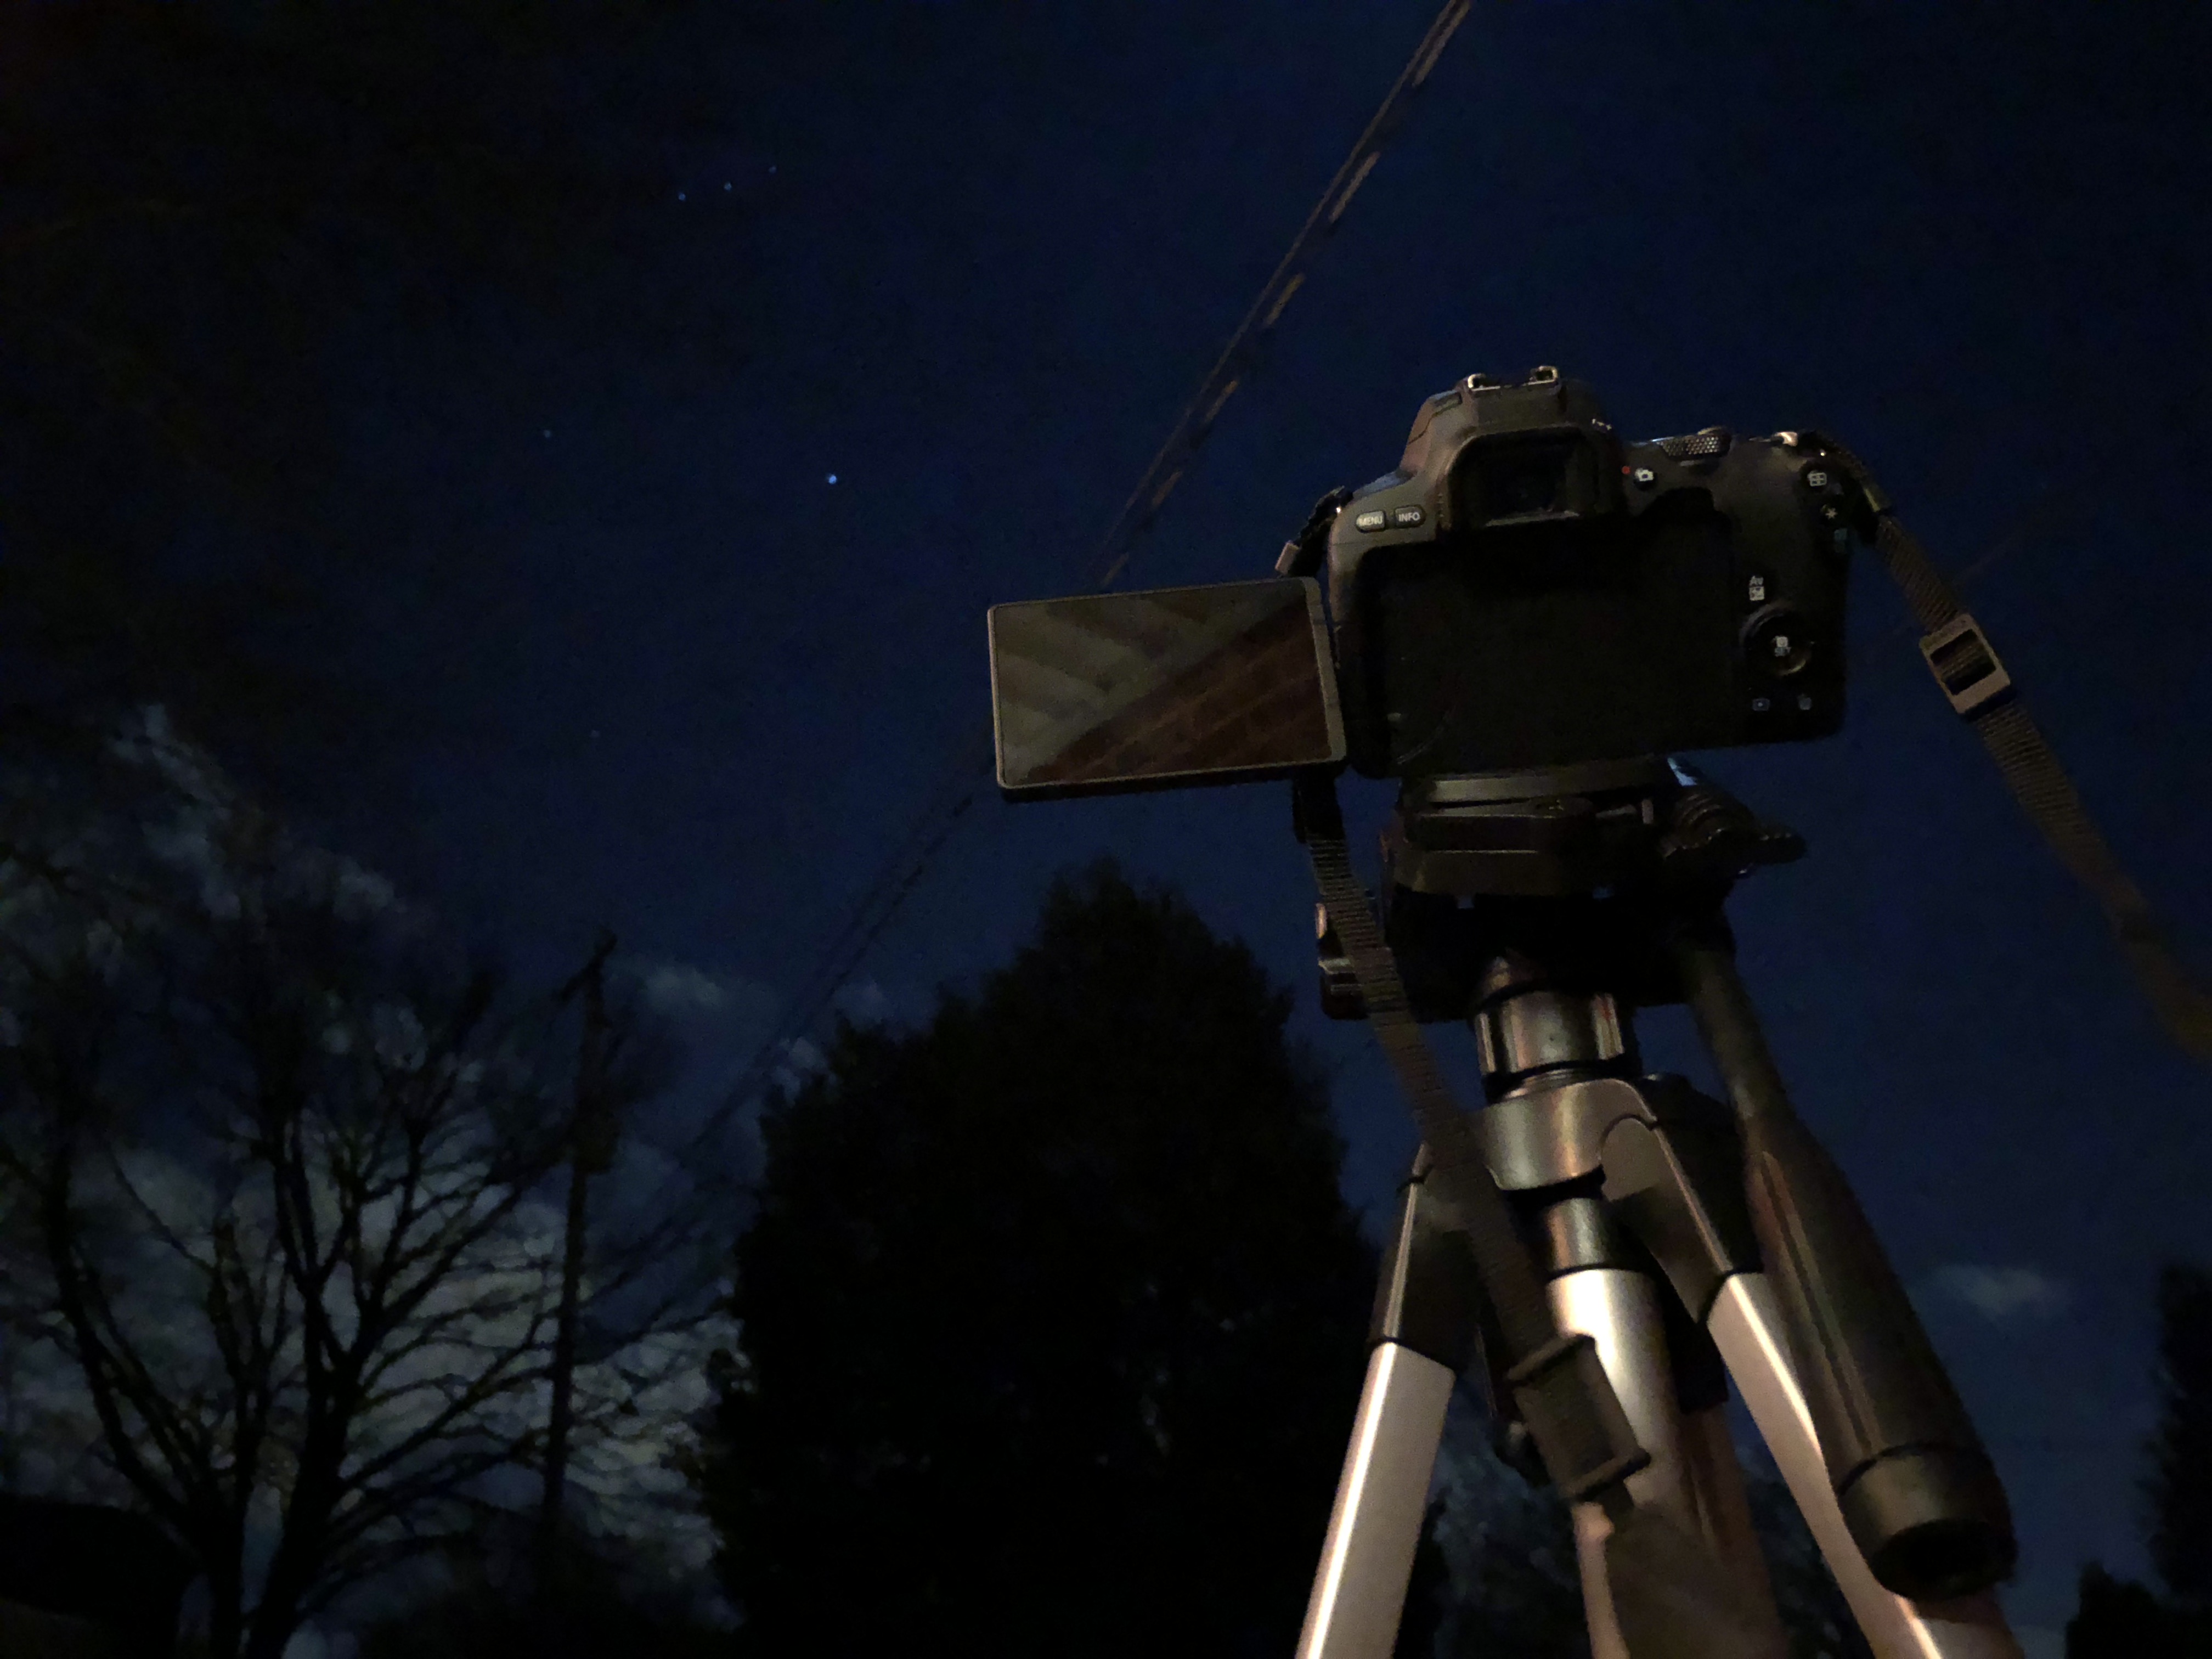
Step 3: Mounting the Camera to the Tripod
The cheapest and easiest way to get into astrophotography involves using a tripod and your DSLR. After connecting the SL2 to the tripod, I chose Orion’s Nebula as my target. Before moving on, I had to determine the proper focal length, focus, aperture, shutter speed and ISO.
Step 4: Setting up and taking the Shot
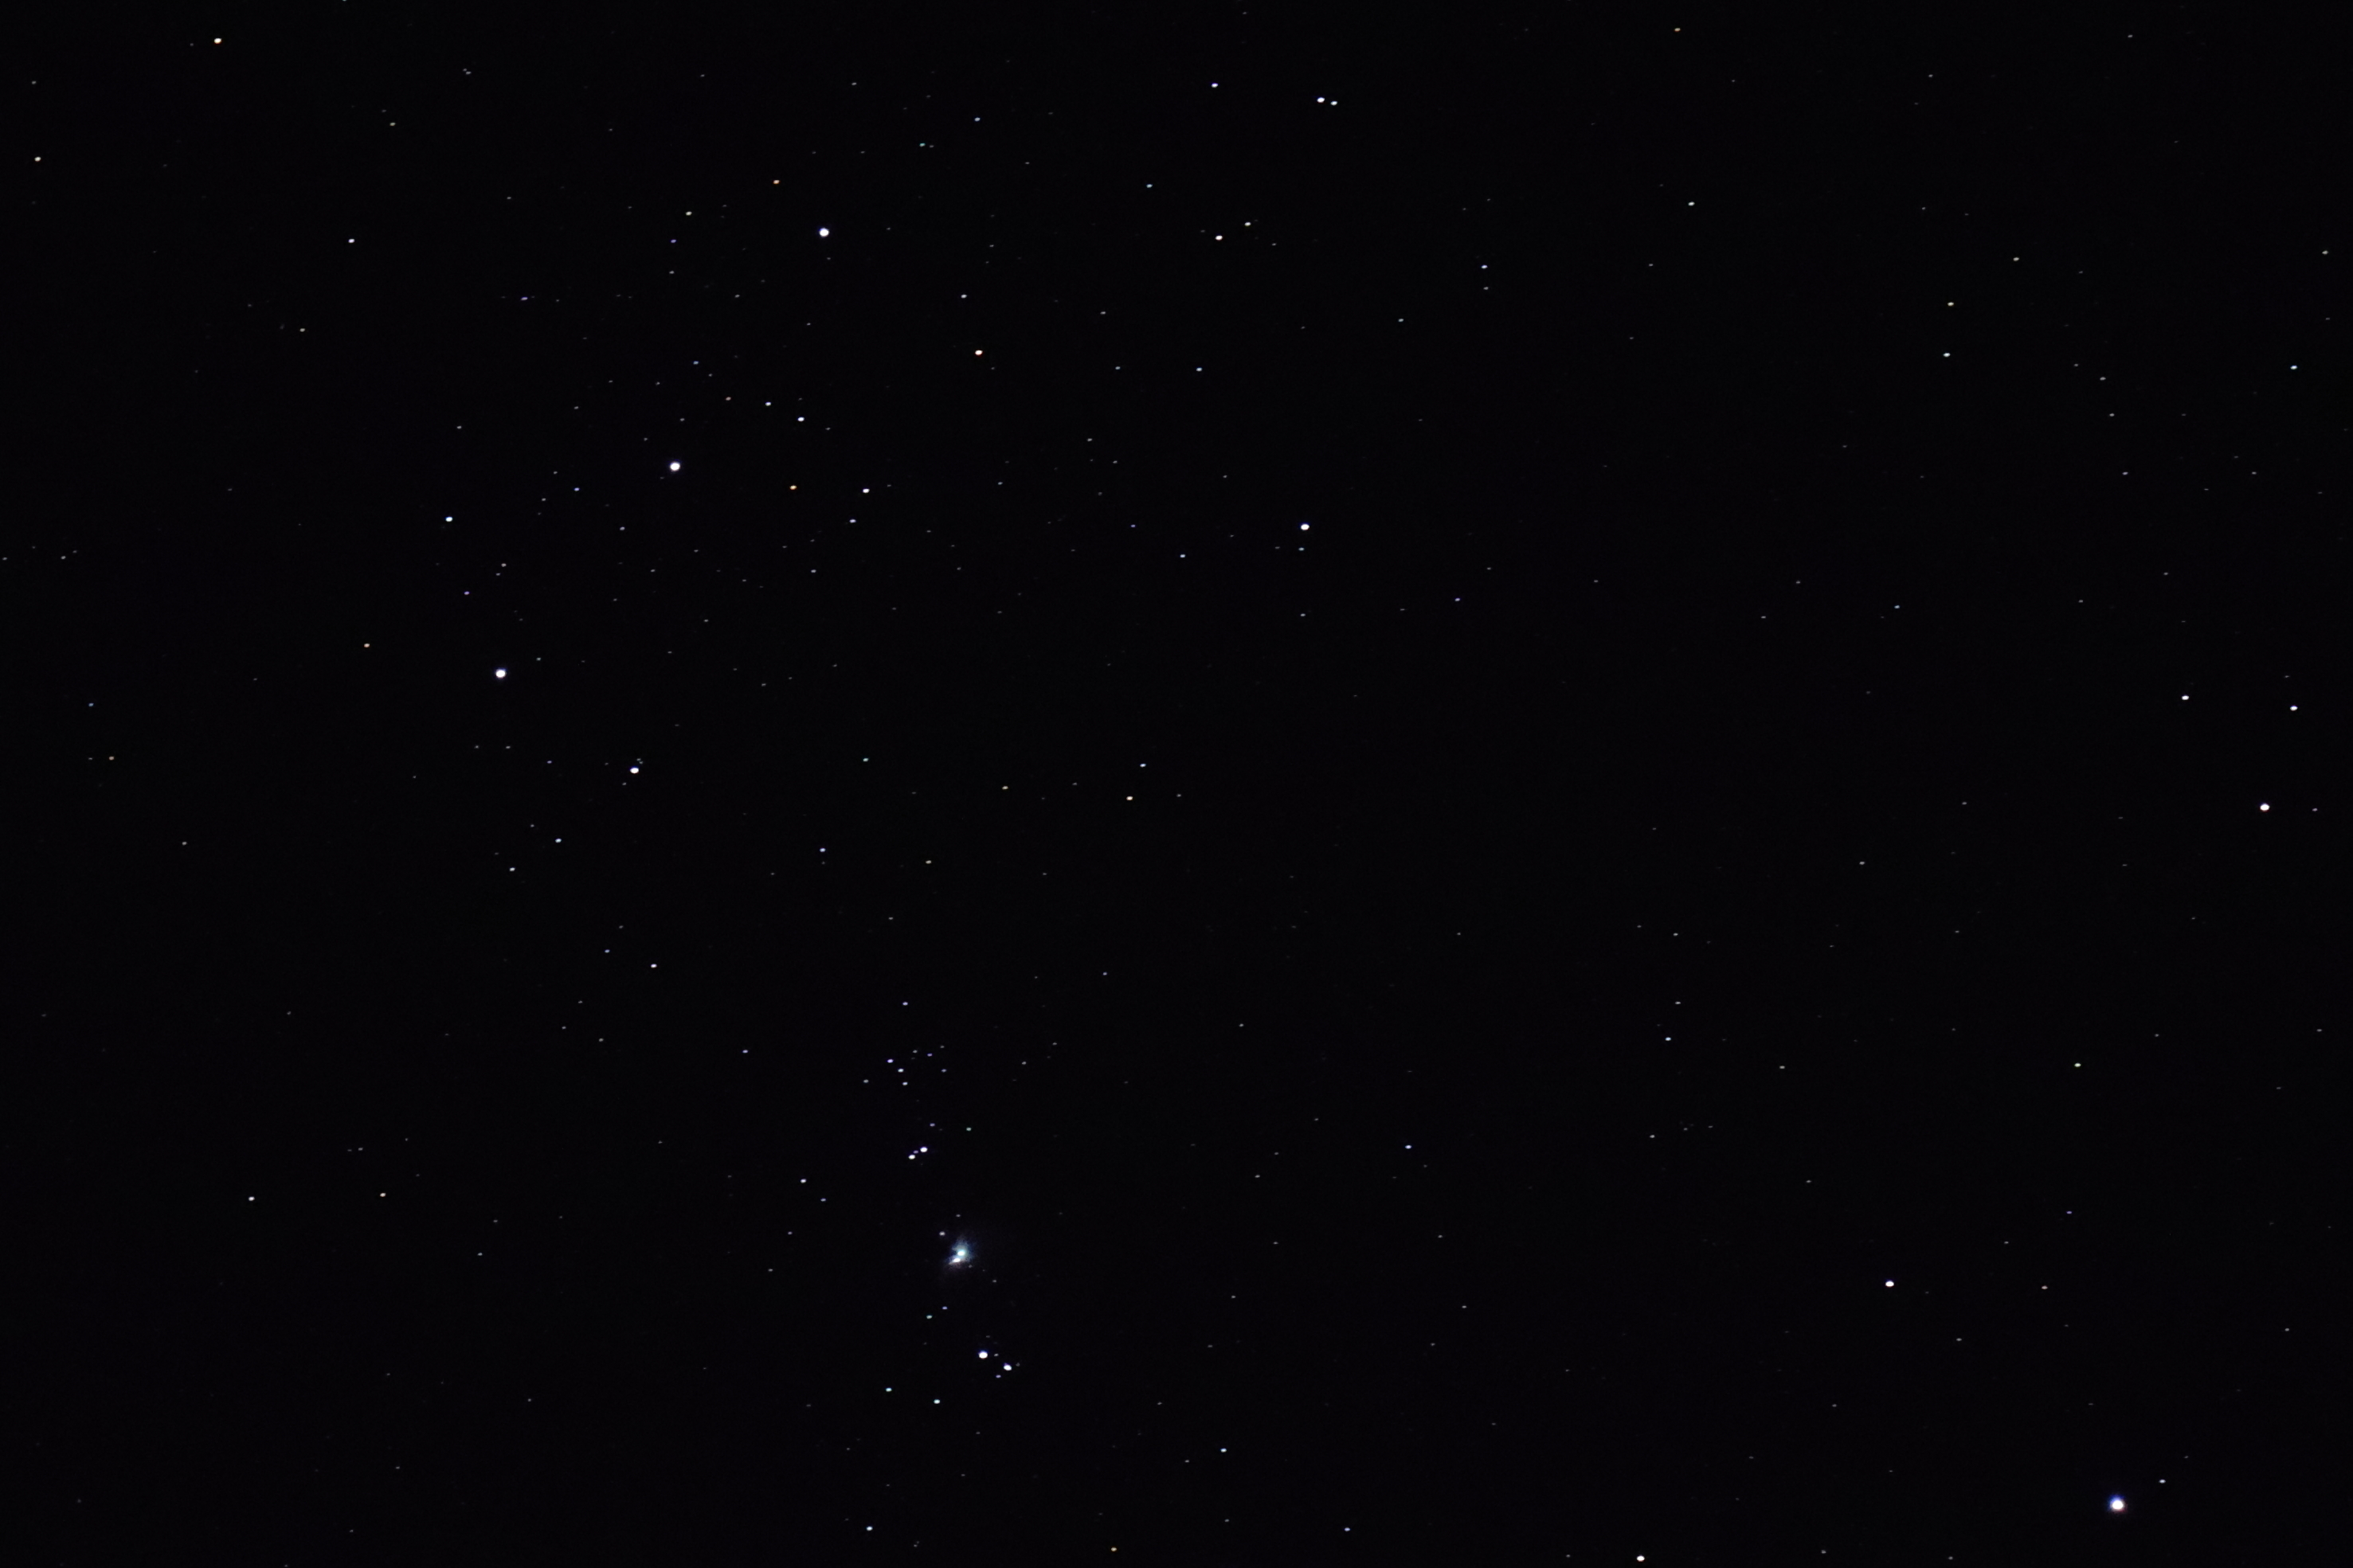
Focal Length and Focus: How zoomed in do you want your image? This is what the focal length controls. I wanted a zoomed in image of Orion’s Nebula, so I chose to set my lens at it’s maximum 55mm focal length. To focus, make sure that your lens is switched to manual focus and use the digital magnifying feature to show a 10x image of the constellation in the live viewing screen. Slowly turn the focus ring until you get the sharpest stars possible.
Aperture: How much light is going through your lens and into your sensor? This is what the aperture controls. The best possible aperture for my zoom lens set at 55mm is f/5.6. This is not a strong point of my kit lens. I hope to upgrade this to a fixed 50mm f/1.8 in the near future.
Shutter Speed: How long do you want your camera’s shutter open to allow light onto your sensor? This is what the shutter speed controls. I was looking for as long a time as possible to bring out detail in Orion’s Nebula, without creating star trails. There are a lot of ways to determine how long the shutter can stay open without creating star trails. The website LonelySpeck has an excellent calculator for determining this setting. For my camera’s sensor and zoom lens set at 55mm, 4 seconds was the longest length of time I could afford.
ISO: How sensitive do you want your camera to be when the shutter is open and light is hitting the sensor? This is what the ISO controls. Increasing it will brighten your image, but also increase digital noise. Finding a balance between sensitivity and image quality will vary depending on your camera’s sensor. For my Canon SL2 shooting Orion’s Nebula a setting of ISO 3200 gave me the best results.
Step 5: Post Processing
How much detail can you bring out of your image? This is what imaging software controls. Canon’s Digital Photo Professional 4 is free software provided by Canon if you buy their products. It is excellent for editing RAW images, which contain much more image information than jpeg files. There are a variety of paid and free choices from Adobe Photoshop to Raw Therapee. The learning curve on these can be pretty steep, but I have found DPP4 to be fairly user friendly and powerful. The most useful settings for me so far have been contrast, shadow, highlight, color tone and color saturation.
The Final Result: Orion Nebula: 12/27/17 Canon SL2, 55mm, f/5.6, 4 Seconds, ISO 3200
Enhanced and Cropped with Digital Photo Professional 4
There have been several sources that have provided me with a lot of the information presented in this article. “The Backyard Astronomer’s Guide” has been my constant companion as I have expanded my interest in amateur astronomy. That book, along with the websites ImprovePhotography, Astropix and LonelySpeck have given me tremendous assistance in my early efforts at understanding astrophotography. Hopefully, this article helped you as well. Please leave a comment with any questions or suggestions you may have.
With my wife and I purchasing our first DSLR camera from Canon, I am taking my first steps into DSLR astrophotography. A new page has been added to the website where I will post my attempts at tripod long exposure astrophotography and eventually imaging through my telescope of the Moon and Planets.
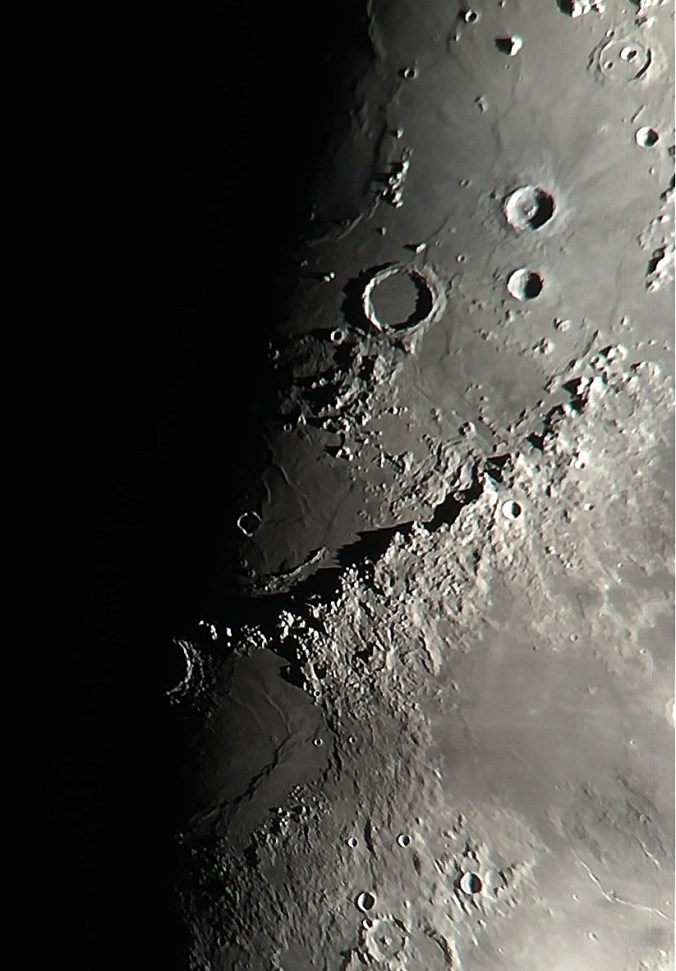
In 2015, I detailed my “Small Steps into Astrophotography”. Since then, I have done little with imaging and processing. That is, until this week. I’ve returned to the complicated, yet rewarding, world of astrophotography. To start, I focused on two great targets for beginners, Jupiter and the Moon. Jupiter, which is near opposition, is as big as it will get in the night sky and the Moon is always a good choice for learning the basics of imaging.
Capturing Video
I began by holding my iPhone 6 over the eyepiece and captured about ten seconds of video for Jupiter and the Moon. The 1080p resolution of the iPhone does a good job at capturing the fine detail on these objects.
PreProcessing Once the videos were captured, I had to find a program that could take my iPhone footage and convert it to a format that my photostacking software could work with. I chose to go with PIPP, Planetary Imaging PreProcessor.
Registax 6 Even though I’ve had some previous experience with Registax 6, I couldn’t remember much about it and had to look up some tutorials that explain the basics of the program. Through this Registax 6 Tutorial, I followed the steps outlined and turned my videos of the Moon and Jupiter into stacked images that brought out fine surface detail.
Jupiter, about halfway through the Registax 6 process.
Premiere Elements To finish up with some additional adjustments to the lighting, sharpness and color hue, I used Adobe Premiere Elements to make some final enhancements.
The Final Results Jupiter and two of it’s moons, Ganymede and Io.
Since the invention of the telescope in the 17th Century, an astronomer’s limit of what can be viewed through the eyepiece has always come down to the sensitivity of the eye peering through the lens. With the invention of photography in the early 19th century and the digital revolution of the late 20th century, the limits of what can now be viewed depend much more on the image sensors, exposure times and tracking systems being used by the observer. As far as we have come in amateur astronomy and digital photography, astrophotography continues to be a complex and expensive extension of this hobby.
Thankfully, the technology to begin experimenting with this process has become embedded in devices used on a regular basis. Late in 2014, I bought the iPhone 6, which among many of its improvements, boasted of an enhanced camera. To test this and try out my hand at astrophotography, I took a couple shots of some of the night sky’s most well known targets.
Orion Nebula Starting with Orion Nebula, I had little expectation for success. As I slowly adjusted the iPhone 6 over the eyepiece, the image came into auto focus, and I was surprised to see the brightest parts of the nebula appearing on the screen. I snapped a handful of images and video, with the one shown above being the most impressive in terms of the gray cloud-like detail of the nebula and sharpness of the Trapezium Star Cluster, located at its center. To my eye, the Orion Nebula appears as a soft bluish-green cloud, but to achieve that through a camera, a longer exposure would be needed.
Pleiades Star Cluster Moving the scope over to one of my favorite star clusters, the Pleiades Star Cluster revealed the most prominent of the Seven Sisters in sharp detail.
Jupiter and the Galilean Moons Jupiter along with its moons Io, Europa, Ganymede and Callisto proved to be a difficult set of objects to accurately capture together. The aperture was a difficult thing to adjust while holding the camera lens over the eyepiece. While it is nice to be able to see the four major moons of Jupiter in this image, collecting enough light to capture them, leads to an over exposure of Jupiter itself. While the major cloud belts are perfectly viewable through the eyepiece, they are washed out in the image.
Astrophotography has been one of those things that I have dabbled in from time to time, but never taken seriously due to a lack of proper equipment. These examples, however, show that with a bit of patience and a smart phone, you can begin to explore the world of astrophotography.
Easter Sunday
The morning of Easter Sunday found my sister Abby and I sitting in Church when the reverend asked all the children to come up to front. Abby, who like me, can be as shy as she is outgoing, decided to stay back with me and watch. The reverend talked for a few minutes about the the rise of Jesus and brought out bags filled with candy and treats that he presented to the kids. As the kids dispersed back to their parents, he walked back up to the front of the Church when it was pointed out to him that my sister had not gotten an Easter bag. He walked over to us and said “Well, it looks like we have a little girl who might have been a little shy about coming up with the other kids today, and we certainly don’t want anyone to be left out on Easter”. He then handed Abby an Easter bag and the smile on her face made for a good start to Easter Sunday.
RegiStax 5
A great Easter lead to clear skies in the evening, meaning that tonight would be the perfect opportunity for my first attempts at photo stacking images of Saturn and Mars taken through a digital camera. Photo Stacking works because the digital camera films video at 640 by 480 pixels 30 times a second. This means that in 1 second, 30 pictures are taken, and if just a few of those are good quality, they can be stacked on top of each other by photo editing software, creating a very detailed image if conditions are right. For the images of Saturn and Mars I used RegiStax 5 to capture and edit the images.
Saturn & Mars
To achieve the images of Saturn, I held the digital camera up to the eyepiece of my telescope. The hard part was finding the planets in the field of view, this is best achieved by using no optical zoom until you find the bright blur that will be the planet. Once this is found, use as much optical zoom as is feasible and then refocus your telescope so that the image in the LCD is sharp. Saturn was much easier to focus than Mars because of the sharpness of its rings being much easier to distinguish than the smaller blur of Mars’ sphere. After taking these videos, I then uploaded the video into RegiStax 5 which then analyzed and chose the best frames to stack of Saturn and Mars. The results were stunning.
Results
In Saturn, the division between the rings can just be made out along with a faint cloud belt right below the rings.
On Mars, the polar ice cap along with some land features show up in the South West portion of the Red Planet
Note: In this example the two images of Saturn were stacked with the image of Mars being only 1 frame.