In this video, I will show you where and when to look to see the Lyrid Meteor Shower. This year, the peak of the shower is going to be on the night of April 21 and into the early morning of April 22. Expect to see anywhere from 10 to 20 meteors an hour with the best sites being at darker locations.
Orion XT8i Review
Video Review
Written Review
From China to Virginia
After a worldwide journey from the mass production factories of China, to Orion’s Headquarters in California, the Orion XT8i ended its journey at my house. Shipped in two packages, one containing the base with the other containing the optical tube, finder scope, two eye pieces and Computerized Object Locator, this new telescope arrived in pristine condition with no dings in the optical tube or base and a beautifully clean primary mirror. Pictures on the internet of this telescope do not do it justice. Even when reading other reviews and viewing pictures posted by those who owned it, I thought to myself “well that must just be a very short man standing next to the telescope.” Taking out the well packaged optical tube for the first time proved my “short man theory” to be incorrect. Do not be intimidated by its size, but do be aware of it. While the telescope tube is bulky in its shape, it weighs only 20 lbs and is easy to carry. The base, with its weight of 21 lbs was packed with the same degree of care as the optical tube and is equally easy to lift once assembled.
Some Assembly Required
Rarely have I ever read directions. This is not a problem when building 10 dollars models, but when putting together a dobsonian telescope, it is probably a good idea. Thankfully, Orion provided a clear and concise manual with step by step instructions alongside pictures and graphics ensuring that  astronomers of various levels of experience will have no trouble figuring out what goes where. With virtually all of the assembly involving the base, it was no surprise that this was the most difficult part of the process. Figuring out the correct order of the washers and how tight the two base plates needed to be proved to be a headache but overall assembly went smoothly, with it taking a couple hours for my brother Alston (the real brains behind the operation) and I to complete.
Our First Night Together
As many telescope owners will tell you, with a new scope comes the curse of cloudy skies, my experience was no exception. About a week after receiving the scope, the skies opened up and I decided to take it out, even though there was still two week old snow on the ground that over time had turned into a solid sheet of ice. With setup complete it was time to uncover the 8 in mirror and test her out. My first target was Saturn. After taking some time figuring out how to use the right angle finder scope, I placed in the provided 25mm eyepiece found Saturn and was blown away by its brightness. With several of its moons visible the brightness and sharpness exceeded my expectations. Up next was the Orion nebula which showed off hues of green and blue that I had never seen before and Andromeda which was a slight disappointment because of my unrealistic expectations of being able to view the spiral arms in great detail. Overall a tremendous introduction to my new telescope, but as this blog has shown, this first night was just the tip of the ice berg in terms of its power and optical quality.
Intelliscope Computer Object Locator
One of the main reasons for buying the XT8i and not the Zhumell Z8 or other less expensive 8 in dobsonian telescopes came from its inclusion of the Computer Object Locator. The marketing claimed that with the easy alignment of two bright stars the intelliscope would display through a numbering system how far right/left and up/down to move the scope. When all numbers reached 0, the telescope would reveal the object in the field of view of a low powered eye piece. Even though this was a main feature that led me to this scope, I definitely had my doubts. As a teenager, going out many times with the Meade DS114, I was never once able to figure out how to use the Object Locator and tracker. Now this could partially have been because of my age and not fully understanding the directions, but I believe it was also from the product not working well. Because of this, testing the object locator on the XT8i for the first time was a bit nerve racking. Aligning the scope and typing in Saturn, the handheld device told me where to move the telescope. Once it was complete, I realized by looking up that it was in the right ball park and was amazed when I looked through the eye piece to see Saturn positioned to the farthest edge of the field of view. This has been my experience with the Object Locator ever since. While it is not always directly in the field of view through my 25mm eyepiece, it is always in the finder scope and can be easily found by searching the small area of the sky that it takes me to. Over the past year, this feature has helped me learn the sky to the point where I find myself needing it less the more I use it.
Optics and Performance
While having a telescope that can help you locate objects is impressive, providing unforgettable views of those objects once discovered is the most important aspect regardless of any extra bells and whistles. While I am not an expert on the optical quality of telescopes and try not to get bogged down in debates over what wavelength a mirror is and the differences between mass produced mirrors from China compared to Taiwan, I can say this. The high magnification views of planets and the lunar surface at magnifications up to 240X have been incredible in this telescope. As has been noted several times in articles throughout this blog, detailed views of the Martian surface, cloud formations on Jupiter and the majestic rings of Saturn have all been viewed with sharp detail at magnifications of 120X and 240X. The 8 inch dobsonian telescope has been described as the best entry level scope for starting to observing deep sky objects. My experience with the XT8i has proven this to be the case. With limited light pollution from my observing sight I have  been able to view the brightness of the Orion Nebula and the dim yet exemplary Veil Nebula. The 5.9 focal ratio of this scope has provided me with the high magnification needed to observe crisp views of the planets and low magnification needed to enjoy nebula, galaxies and star clusters.
Overall Summary
Posted on telescope.com: 1/22/10
This telescope balances the three needs of any amateur astronomer: aperture, portability and affordability. I have seen everything from low power viewings of Orion’s Nebula and Andromeda to sharp high power observations of Mars, Saturn and Jupiter that revealed detailed land features, rings and cloud belts. Clear directions walked me through every step of assembly with my only difficulty dealing with connecting the two base plates of the Dobsonian mount. The Computerized Object Locator (COL) included in this package is a deal that cannot be beat. Powering up the COL, I set the telescope to vertical, do a two star alignment and view more objects in an hour than I would have in most entire nights. On top of all of these features, the 25mm and 10mm eyepieces included provide a great starting point for viewing nebulae and galaxies as well as planets and lunar observations. While I am sure many people will be able to carry this scope out in one piece, I carry it in two, because of its weight and how long it is. After a year of use, I have barely scratched the surface of all the objects the XT8i can locate and observe. High quality optics, affordable aperture and the Computerized Object Locator make this the perfect telescope for beginners and experienced astronomers alike. I know it will provide a lifetime of use and enjoyment.
Information From Telescope.com
Orion SkyQuest XT8i Computerized IntelliScope
Orion SkyQuest XT8i Computerized IntelliScope
Product Specifications:
| Use | Astronomy |
| User level | Intermediate |
| Optical design | Reflector |
| Optical diameter | 203mm |
| Focal length | 1200mm |
| Focal ratio | f/5.9 |
| Optics type | Parabolic |
| Glass material | Soda-lime plate |
| Eyepieces included | Sirius Plossl 25.0mm, 10.0mm |
| Magnification with included eyepieces | 48x, 120x |
| Resolving power | 0.57arc*sec |
| Lowest useful magnification | 29x |
| Highest useful magnification | 300x |
| Limiting stellar magnitude | 14.2 |
| Optical quality | Diffraction limited |
| Finder scope | 9×50 Correct-image, right angle |
| Focuser | 2in. Crayford |
| Secondary mirror obstruction | 47mm |
| Secondary mirror obstruction by diameter | 23% |
| Secondary mirror obstruction by area | 5% |
| Mirror coatings/over-coatings | Aluminum and Silicon Dioxide |
| Mount style | Dobsonian |
| Astro-imaging capability | Simple moon shots |
| Computerized compatibility | Intelliscope included |
| Alignment procedure | 2-Star Alignment |
| Number of objects in database | 14,000+ |
| Bearing material | Teflon and UHMW bearings |
| Power requirement | 9-volt battery |
| Available ports | RS-232 |
| Tube material | Steel |
| Tripod material | Wood |
| Length of optical tube | 44.5 in. |
| Weight, optical tube | 20.3 lbs. |
| Weight, mount/tripod | 21.3 lbs. |
| Weight, fully assembled | 41.6 lbs. |
| Additional included accessories | IntelliScope computerized object locator HC, Eyepiece rack, Collimation cap |
| Other features | Navigation knob, 2in. Crayford focuser |
| Warranty | One year |
How to find Comet Atlas
This April and May, Comet Atlas has the potential to be one of the greatest sites in astronomy. In this video, I’ll take you through “SkySafari Plus” to show you what parts of the sky Comet Atlas will be traveling through as it makes it’s closest approach to Earth on May 23rd. What better way to bring people together during this difficult time than a Comet that a good portion of the population will be able to see and experience together from our own backyards. Music:
“The heavens declare the glory of God”-Psalm 19:1
Follow Late Night Astronomy on:
http://www.youtube.com/latenightastronomy
http://www.instagram.com/latenightastronomy
http://www.twitter.com/latenightastro
A Plane Flying in front of the Moon
My wife and I were out imaging the Moon and all of a sudden American Airlines flight 2043 to Atlanta decided to do a flyby! We could not believe how perfect the timing was, the record button had just been pressed a few seconds before!
Equipment Used: Canon SL2, EF-S 250mm Zoom Lens 1080p,
60 FPS
“The heavens declare the glory of God”-Psalm 19:1
Follow Late Night Astronomy on:
http://www.youtube.com/latenightastronomy
http://www.instagram.com/latenightastronomy
http://www.twitter.com/latenightastro
A Step by Step Guide to Imaging the Planets: Using PIPP, Autostakkert, Registax and GIMP
How do you take pictures of the planets? What type of equipment is needed for imaging? Have you ever wanted to take pictures of the planets using your telescope and an iPhone or camera? This video will show you the basic steps to set up, capture and process images of Venus, Mars, Jupiter and Saturn.
Great Budget Eyepieces For Your Telescope
How do you figure out magnification? What types of eyepieces should you buy for your new telescope? What magnification works best for different objects? This video will help you figure out where to start for your first eyepiece purchases and will hopefully show that you don’t have to break the bank to get great views from your telescope.
Orion Q70 Eyepiece
http://www.telescope.com/Orion-Q70-Super-Wide-Field-2-Telescope-Eyepieces/e/66.uts
Orion 25mm Eyepiece
http://www.telescope.com/Orion/25mm-Orion-Sirius-Plossl-Telescope-Eyepiece/rc/2160/p/8741.uts?keyword=25mm%20eyepiece
Orion Planetary Eyepiece
http://www.telescope.com/125mm-Orion-Edge-On-Planetary-Eyepiece/p/8882.uts?ensembleId=68
Imaging the Orion Nebula with a DSLR and the SkyGuider Pro
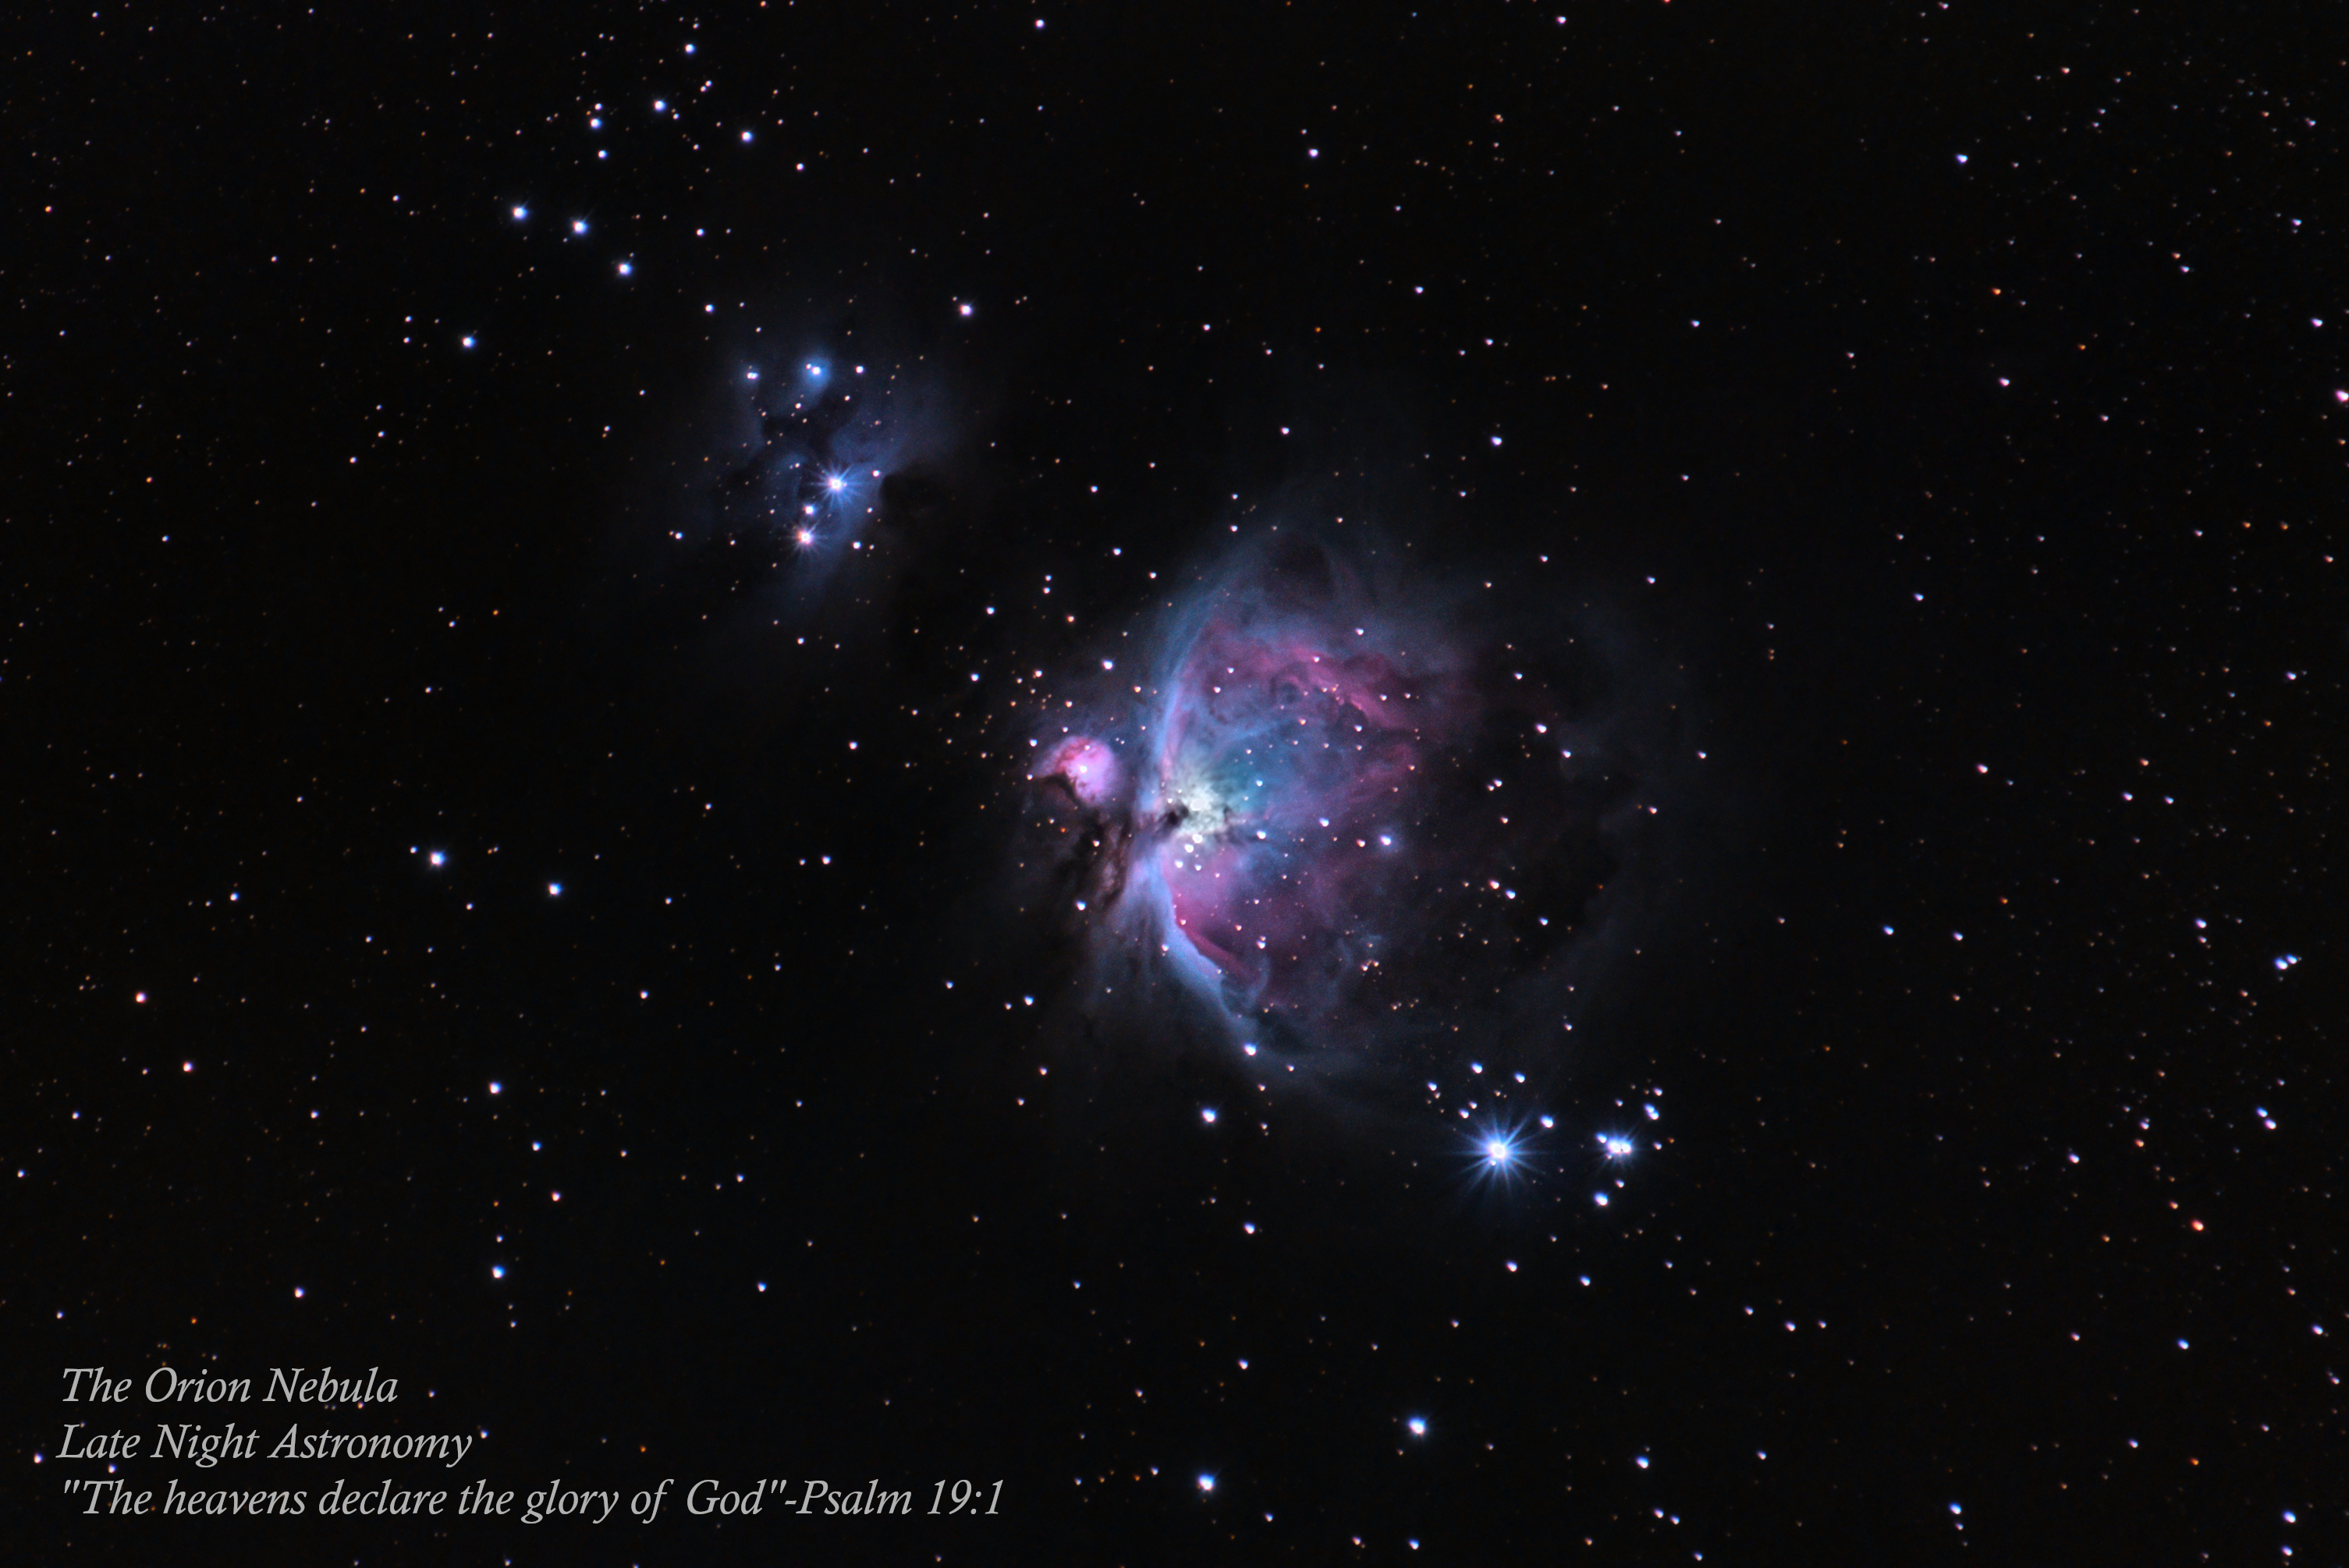
On a cold but crystal clear 28 degree night, I balanced and aligned the SkyGuider Pro, attached my DSLR and focused in on the Orion Nebula, a target I had been waiting to image since first getting into astrophotography.


Located roughly 1,300 light years away, the Orion Nebula is one of the closest stellar nurseries to our planet. It’s impressive size and gorgeous colors makes it one of the most viewed and photographed objects in the night sky. This 50 minute exposure is beyond what I expected to get for my first attempt at photographing this beautiful nebula.
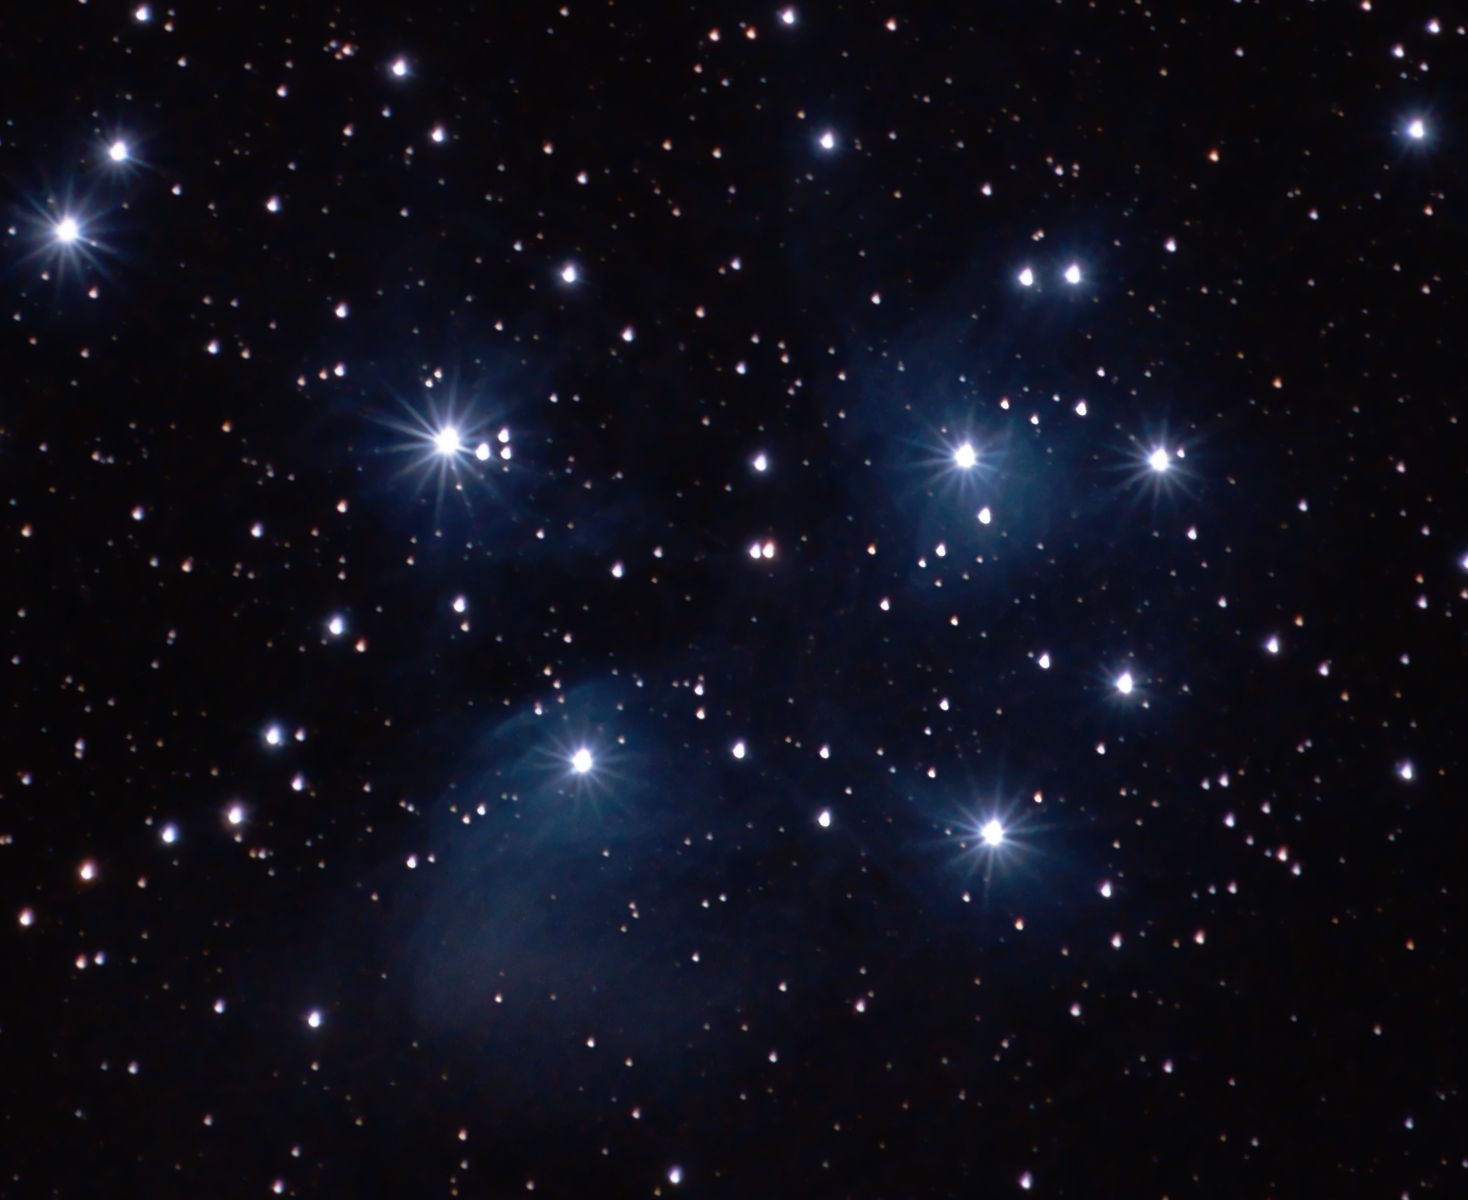
Imaging the Pleiades Star Cluster with the Skyguider Pro
With one hour and twenty minutes of exposure and several hours of processing, I have finished my work on the Pleiades Star Cluster. Also known as the seven sisters, its stars are surrounded by blue nebulae, which are difficult to see in a telescope but easily visible through long exposure photography. As the blue stars move through these dust clouds, their light reflects off of them creating the nebulosity in this image. I am really pleased with the faint details of the clouds and their complex structure.

Completing the Messier List

The Final Two!
M74-The First Attempt
With two dim galaxies left to go on the Messier List, I arrived at Back Creek Valley Overlook around 8:15 PM to skies that were clear and steady, ranking a 6 for transparency and very good to excellent for seeing conditions. I first turned my attention to M74, one of the dimmest and most difficult objects to view on the Messier List. The pattern of stars were right where they should have been, but no M74. After a few more failed attempts, I decided to move on to my other object of the evening.

Where are you?
M33: The Triangulum Galaxy
The Triangulum Galaxy is massive and, due to its size, has a low surface brightness. A 2 inch eyepiece providing 32x magnification gave the best views of this large galaxy, which was easier to distinguish from the background sky than I expected. With M33 documented, I now was down to my final Messier target, but the surprising ease of observing the dim M33 made me concerned that M74 wasn’t going to show itself tonight.
Easier Than Expected!
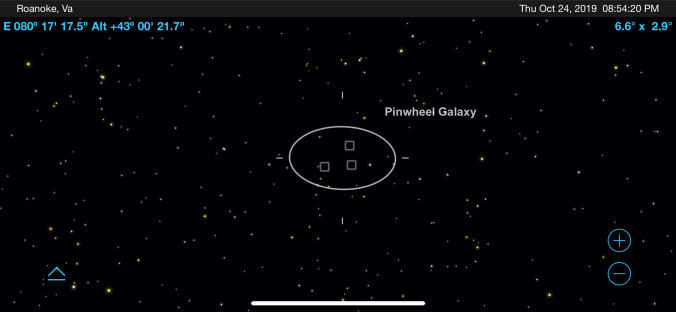
M74-The Final Attempt
If M74 wouldn’t show itself under these ideal seeing conditions, I had two options. Drive to a darker location or use a larger telescope next time I was observing with friends. I didn’t feel like driving any farther tonight and was determined to get all of the Messier targets with my own 8 inch Dobsonian. Around 8:30 PM, my attention turned exclusively to observing M74, and it still wasn’t showing itself. After about 10 minutes of attempts, I thought some faint signs of cloudy detail were possibly coming through, but it was nothing I was comfortable with documenting as a sighting. I then spent the next 15 minutes with a sweater draped over my head to create a “dark room on the Parkway”. Going between 48x and 96x magnification, some more stars slowly started to appear where just a few minutes before there was only darkness. Finally, around 8:50 PM, my “darkroom” was paying off, and the ghostly smudge of a galaxy core began to lift itself out of the background of space. With the extremely faint smudgy core of M74 now appearing exactly where it needed to be on my star chart, I documented my last Messier target at 8:54 PM on October 24, 2019.
After 27 separate observing sessions spanning nearly two and a half years, my journey through the 110 objects that make up the Messier List fittingly ended on two dim fuzzy galaxies viewed from the Blue Ridge Parkway. Here are some stats regarding my time observing the Messier List.
The Messier List
Project Began: June 11, 2017
Project Completed: October 24, 2019
Time Elapsed: 2 Years, 4 Months and 13 Days
Observing Sessions: 27 Nights
Most Objects Viewed in One Session: 11
Averaged Viewed Per Session: 4
Objects Viewed from Home: 94
Objects Viewed from Parkway: 16
Favorite Messier Objects:
M6, M7, M11, M13, M17, M24, M27, M31, M37, M42, M45, M57, M67, M76, M81, M82
Imaging The Andromeda Galaxy with the SkyGuider Pro
The Andromeda Galaxy is one of the most impressive spiral galaxies in the night sky. Even at a distance of 2.5 million light years its massive central core takes up about as much sky as a full Moon. This image captured over 1 hour worth of light from Andromeda’s 1 trillion stars and took about 3 hours to process and edit!

“The heavens declare the glory of God” Psalm 19:1
